API for Ninja Forms
A robust and easy-to-use REST API for Ninja Forms, allowing you to integrate your form submissions with external applications and services.
With support for both JSON and PDF output formats, you can retrieve form data in a structured format submissions.
Benefits of the API for NinjaForms plugin
JSON & PDF Output
Access your Ninja Forms data in a standardized JSON format, perfect for integration with web applications, CRMs, and other systems.
Features:
- Access your Ninja Forms data in a standardized JSON format, perfect for integration with web applications, CRMs, and other systems.
- Generate high-quality PDF documents from your form submissions, ideal for invoices, reports, or records.
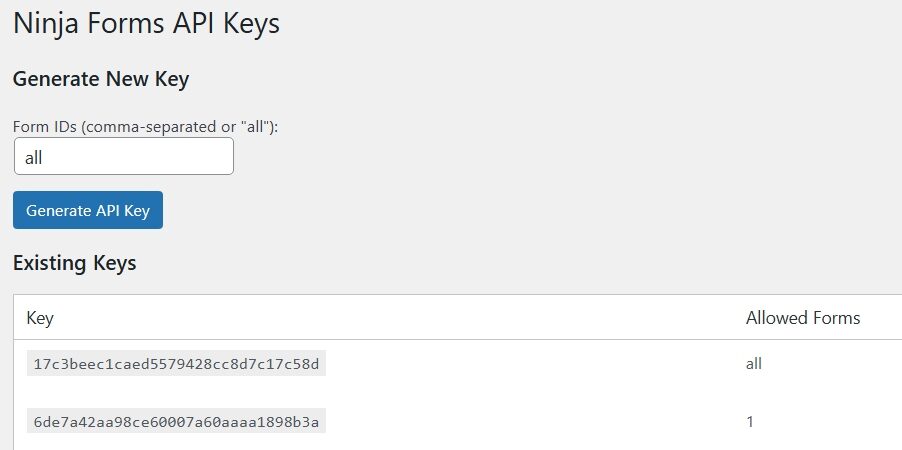
- Secure API Keys: Easily generate and manage API keys to control access to your form data.
- Lightweight and Optimized: Designed for performance, ensuring minimal impact on your website’s speed.
Tagged plugins